After I posted my "clone" photos last week, I received quite a few emails asking me how I did it. So I’ve decided to throw together a quick tutorial. Hopefully I can make this clear enough for everyone. It’s really a quick and easy trick to pull off.
To do this you’ll need to have Adobe Photoshop (I’m using Adobe Photoshop CS2), a camera, preferably a tripod, and a person to take the picture of.
- Decide what you want the subject to do in the photo. Try to make it interesting.
- Set the camera on a tripod. You’ll be taking two photos and you need the background to be the same in both. If outdoors you need to take the picture fairly quickly so things like lighting and clouds don’t change much. Position your subject for the first photo, then move them for the second without moving the camera or changing the adjustments. It’s easier if the subjects positions aren’t overlapping.
- Open the two photos into Photoshop. In the example below I’m attempting to make it appear as though my friend Luis is jumping over himself. If you don’t have photos of your own to use but would still like to give this a try, you can use mine by clicking HERE and HERE.
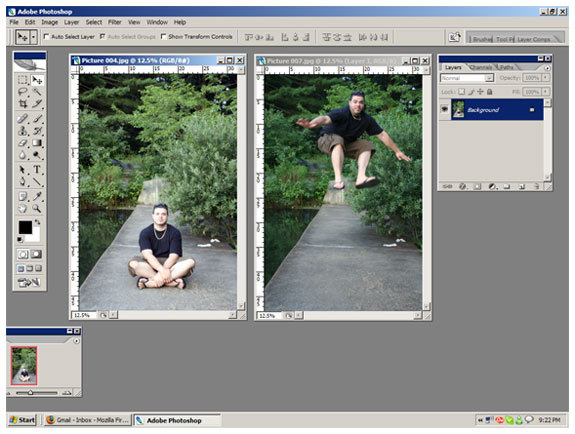
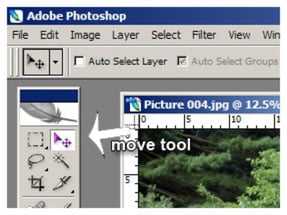
- Make sure you can see both of your photos on your screen, side by side. Select the "Move Tool" from your toolbar which is on the left hand side of your screen by default.
- Once you have selected the Move Tool, click on the image on the left and drag it over until the image on the right is outlined with a rectangle. Release the mouse.
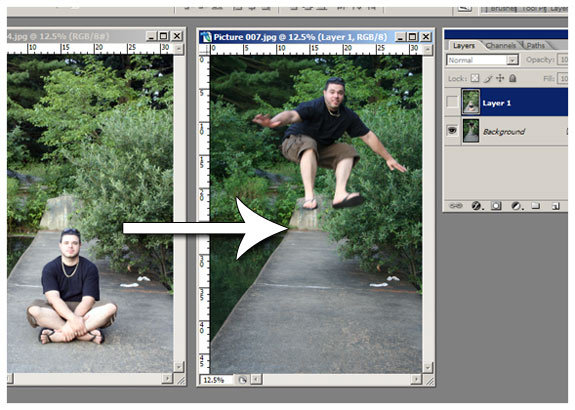
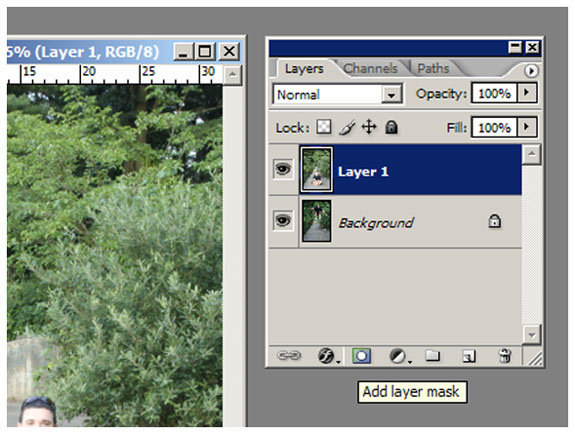
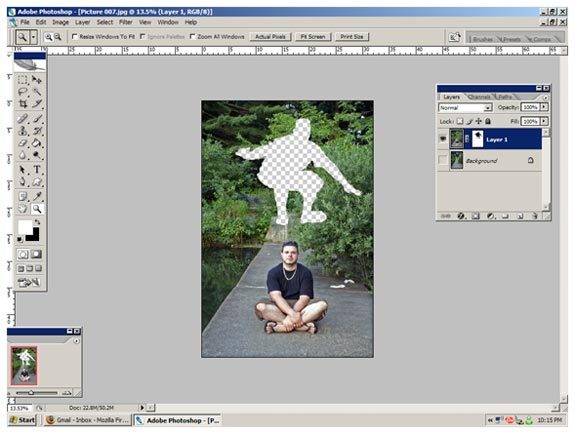
- Make sure you have the Layers palette open. If you don’t, you can find
it under the "Window" menu on the top of your screen. If you see the
image you just dragged over in the Layers palette you’ll know you have
successfully completed the previous step. It should be labeled as "Layer 1", as shown below. The original image is labeled as "Background" and is resting underneath "Layer 1". - At the bottom of the pallet you’ll see a square button with a circle in the middle. When you drag the mouse over it should say "Add layer mask". Select this button.
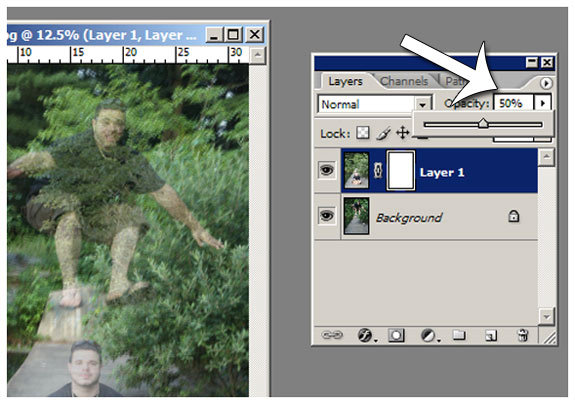
- Bring the opacity of "Layer 1" down to 50% by dragging the slider to the left as shown below. You’ll see the background layer begin to show through "Layer 1". I’ve pointed to the opacity box in the image below.
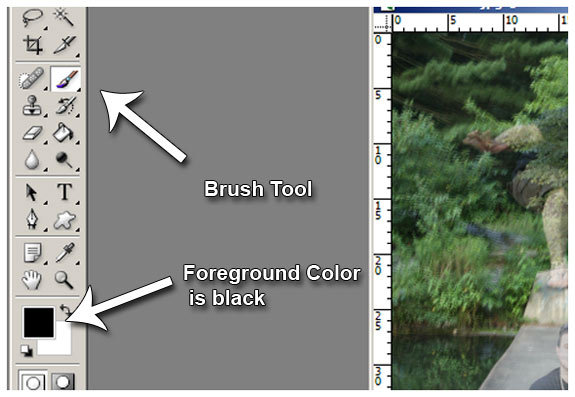
- Now go back to your toolbar on the left, and select the paintbrush tool. Make sure your foreground color is pure black. This is very important.
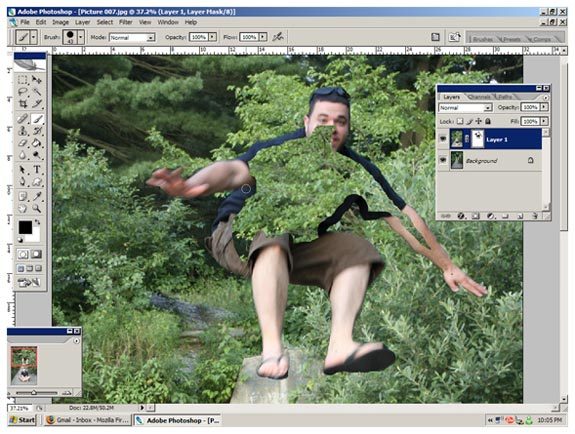
- Using the paintbrush tool, you’ll begin to trace the subject from the "Background" layer. As you do this the subject will begin to lose it’s transparency, and start to look as if it’s on the same layer. Be careful as you trace the subject. Try to be as precise as you can. This will help keep your final result looking as if it were real.

- Once you’ve completed the outline, you can begin to fill in the middle of the subject with the paintbrush. Basically, all you’re doing here is cutting a hole in "Layer 1" using the paintbrush tool. If you screw up, you can change the foreground color to white and paint over the area where you just slipped. This simply patches up the hole.
- Just to show you what I mean by "cutting a hole", here’s an example of what "Layer 1" would look like if you removed the background. You don’t need to do this as this is just an example.
- Once you’ve traced over the entire subject from the background layer, you can bring the opacity of "Layer 1" back up to 100%. If it looks unnatural, you should bring the opacity back down, and try to repeat the previous steps but with more precision.
- In the upper right-hand corner of the Layers palette you’ll see an arrow. Select the arrow to open up a drop-down menu. Towards the bottom of the drop down menu you’ll see "Flatten Image". Select this.
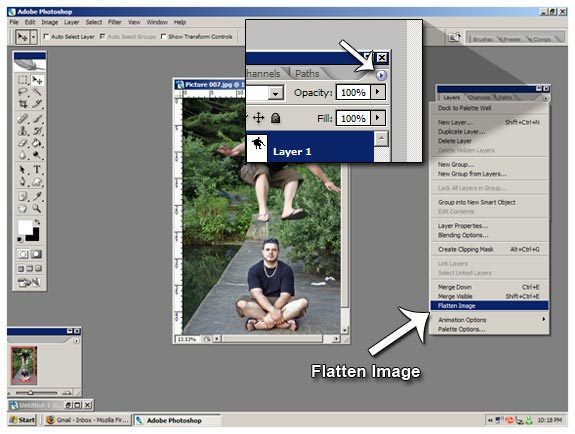
- You’ve now flattened your two layers into one single layer and have completed the final step. I’d recommend adjusting the image levels and experimenting with the curves and hue/saturation. You can find these options under the "Image" menu at the very top of your screen in Photoshop.
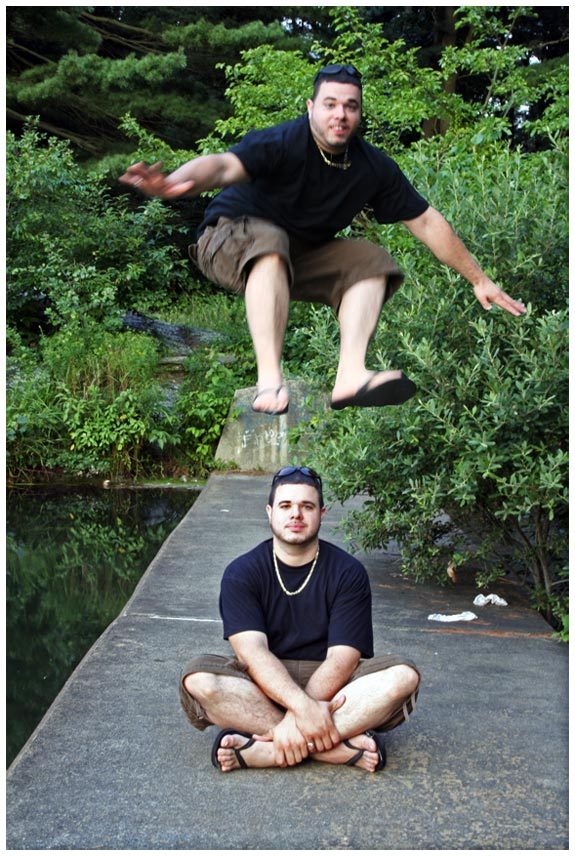
- When you’re satisfied with how your image looks, go to File > Save As, and you’re done. Below is my finished example. Unfortunately it wasn’t the best two images to chose from, and I was somewhat sloppy throughout the whole process. But I had to throw this tutorial together pretty quickly, and it’ll have to do. For another example, you can see my previous post here. If you have any questions, leave a comment below and I’d be happy to help you out. And if you give this a try, please post a link to your finished result in the comments.